

Coffee Filter Turkeys: Time to plan a November Thanksgiving Project. I started making these Tie-Dye turkeys 20 years ago (gasp!) I’ve been playing with all the different ways you can dye coffee filters and have even made peacocks.
Did you see the fabulous fruit turkey my friend Charlene made? That turkey is out of fruit, but this coffee filter turkey is a colorful craft! This makes a great preschool turkey craft!

Coffee Filter Turkey Craft
You Will Need:
- Coffee Filters (click here)
- Crayola Markers
- Paper scraps of brown, orange, red and black
- Hole punch – for eyes (or just use a crayon)
- Rubber Gloves (only if you’re doing a lot – the ink can stain your hands)
 |
Click here for Coloring Tips

How To Make Your Turkey:
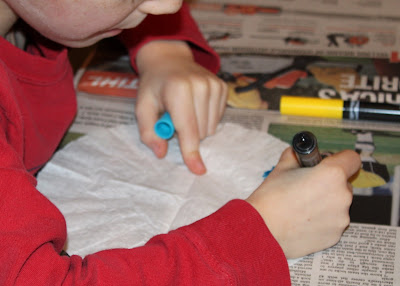
Step 1
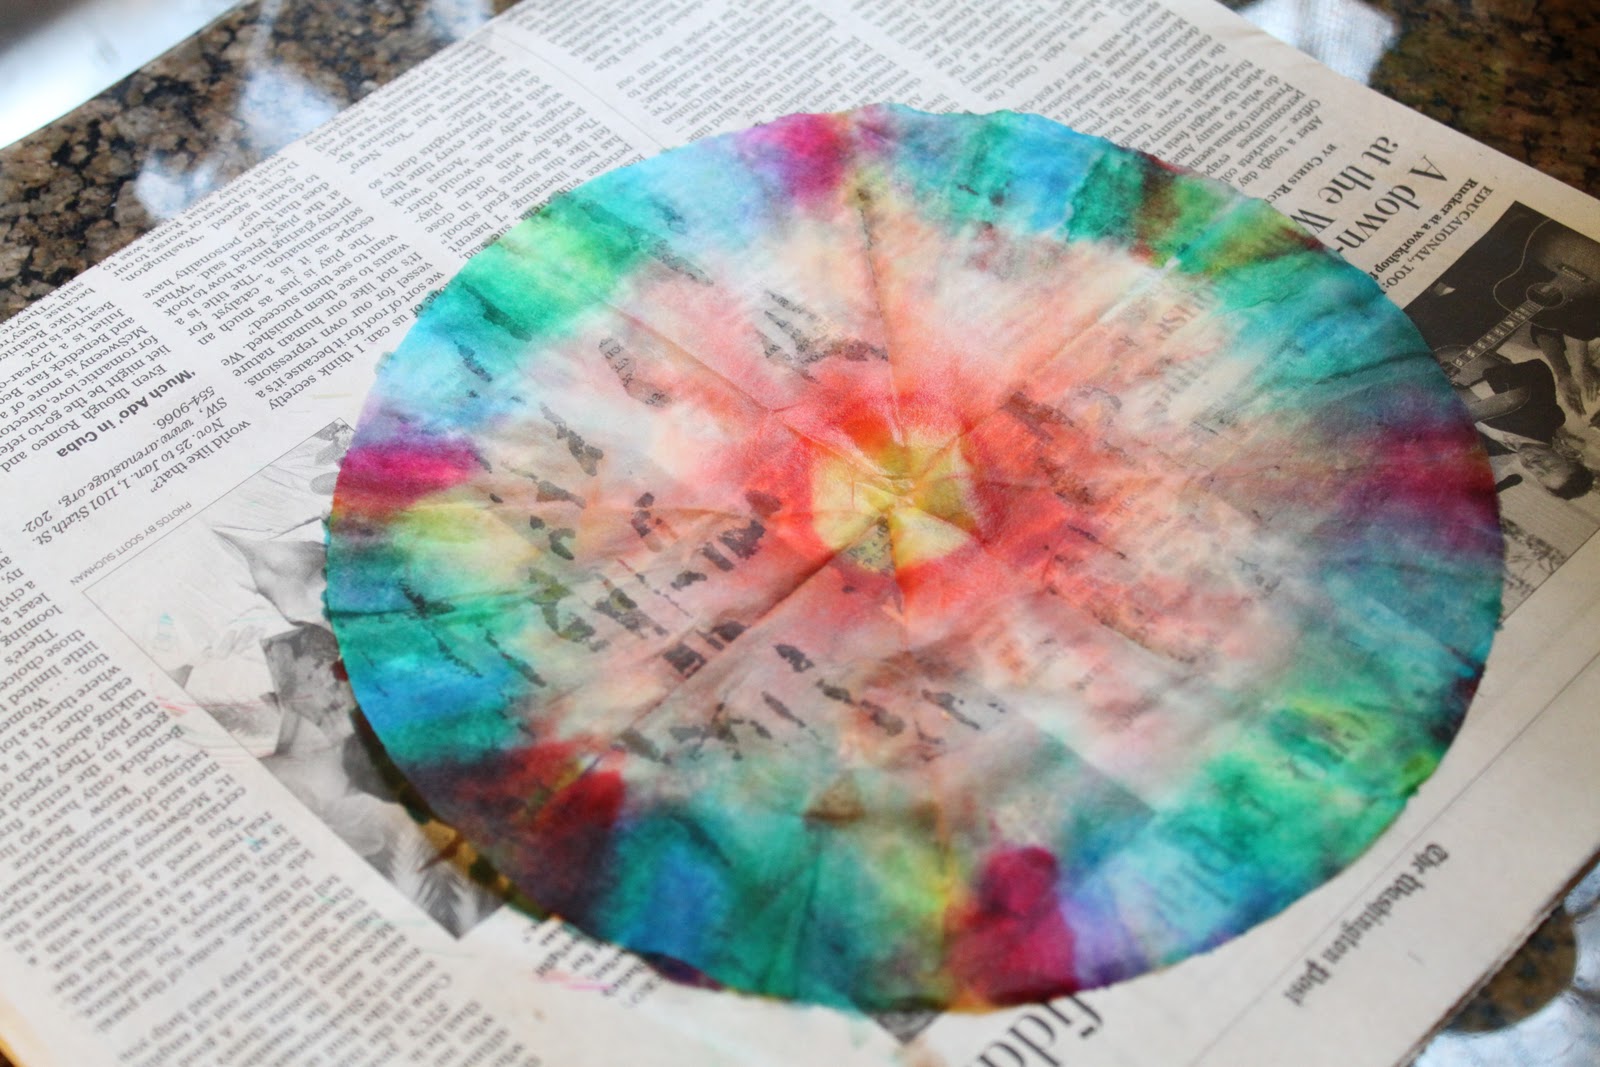
Color your coffee filter. You can color it in blotches, stripes, or patterns. You only need to color half of it because all of the colors will blend together. See a variety of different ways to color coffee filters and their final outcome.
Step 2
Lay out your newspaper and put on your gloves.

Step 3
Fold your filter in half and half again, until it looks like a piece of pie.
Step 4
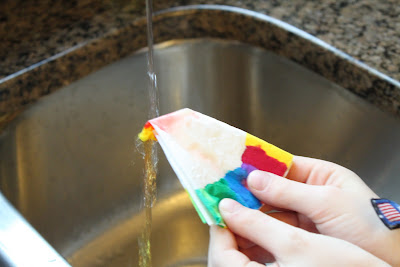
Parent / Teacher supervision for this part: Turn on your water faucet. Just the tip of the coffee filter needs to get wet. The water will absorb through the end.
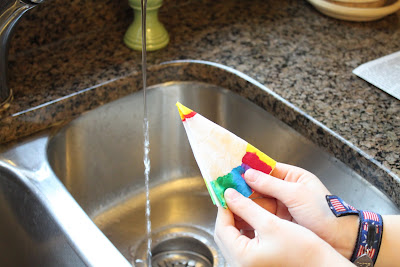 |
Step 5
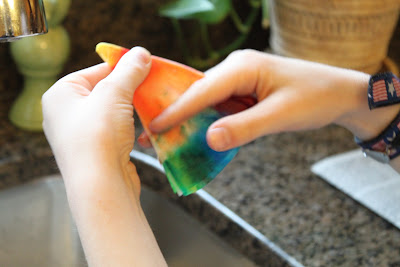 |
Step 6
Let the filters air dry while the kids get busy making the turkey body.
 |
Step 7
Our turkey body is the shape of a bowling pin and about the size of your hand. For the classroom, I made a cardboard turkey body template for the kids to trace. For my own children, I hand drew the outline of the turkey body.
 |
Step 8
Add a little triangle orange beak, a red squiggly waddle, punch out two black circles for the eyes, and use scraps to make some feet. Now glue the dried coffee filter to the back of the body, now you have your own Coffee Filter Turkey!
 |
Coffee Filter Turkeys….they make great Thanksgiving decorations and sun catchers too!
Very cute idea! Thank you!
I assume you used washable markers, right?
Alexis – thanks for asking! Our markers are actually not washable, that’s probably why our fingers looked dyed! Washable would probably be great too.
This is perfect for my first graders! I will have them trace their shoe for the turkey’s body. Thank you!
Yeah Midge! I made them for years when I taught first grade. Wear gloves or else you’ll look a little colorful by the end of the day!
This is such a great idea! Thank you so much for sharing!
This is such a cute idea! Thank you so much for sharing!
Hi, I wanted to let you know I featured this on the EtsyKids Team blog along with 50 other Thanksgiving crafts, recipes and printables for kids.
http://etsykids.blogspot.com/2012/11/50-thanksgiving-crafts-recipes-and.html
I let my first graders spritz their filter with water bottle! Leave on paper plate to dry!
I love how you dipped them in the water – this makes for such a fun process and beautiful turkey too!
Thanks for this craft! It was mega fun and super cute! We used markers in shades of brown for the body on white paper. We wet the body and the colors blended, so it looks 3-D. Fun project!
Thank you for this creative idea! I am excited to do this craft with my class!
About how long do you think it would take for them to try? I will be doing this with a group of my patients for the holiday as part of a holiday event. It will be set up in stations and they only get about 5-7 minutes per station.
Hi Samantha – I usually let them dry for at least an hour on newspaper. Could they be made ahead of time and then at the stations put them together – make the bodies, add legs, eyes, and glue the feathers. Just a thought!
That is a great idea! Thank you!
Thanks for responding Samantha. Turn them over and use dry newspaper to help them dry a little faster. If you do them a day early, they can actually be stacked on top of one another. One more tip… write names on with a ballpoint pen BEFORE you do the dying / water process.